![]()
Welcome to the Dungeon![]
Green Dungeon is a tile based solitaire dungeon exploration game. The game play and rules are meant to evoke an old-school dungeon crawl, where the player navigates the tunnels and chambers of a subterranean complex, filled with monsters, traps, and magic. The object of the game is to defeat the two bosses that rule the dungeon.
While you are welcome to play the game as described, I encourage the player to craft a narrative of their exploration as they play. Instead of simply fighting "a monster with a difficulty value of 2", I invite you to imagine the powerful Orc warrior who stands before you, defending a treasure chest. While the rules may say that your character takes 3 points of magic damage from a trap, picture your character getting zapped by a magical bolt of electricity emanating from the jeweled eyes of a cursed statue. Perhaps the bosses are the shaman and chieftain of a goblin tribe. Perhaps they are a pair of evil wizards who scheme to take over the kingdom... you can decide.
Have fun and let your imagination be your guide as you delve into the dreary darkness of the dungeon!
Components Used[]
Tiles[]
- Drop tiles x6, which will represent typical combat areas
- Hammer tiles x4, which will represent difficult combat areas
- Wood tiles x4, which represent areas of magic in the dungeon
- Brick tiles x4, for trapped areas of the dungeon
- Cog tiles x5, for treasure rooms
All of these tiles (23 in total) are shuffled face down to create the dungeon stack.
Set aside two Straw tiles, which represent the lair of the mini boss and the final objective
It is helpful to reserve an additional Hammer, Cog, and Straw tile to use to mark the card decks (see below). All other tiles are returned to the box.
Cubes[]
We will (potentially) use all of the cubes that come with the basic green box, as follows:
- Red cubes are used to track the player's health.
- Blue cubes are used to track your magic.
- Yellow cubes represent the treasures you collect in the dungeon.
- Green cubes help track your experience points.
In addition, if you have the MMX expansion for the Green Box of Games, we will use some of the black and white cubes as well as the meeples. If you do not have those available, you can use any other sort of counters or miniatures that you have on hand for this purpose.
- Black cubes are used to track the passage of time in the dungeon.
- White cubes represent your character's store of luck points.
Note that there may be instances where you do not have enough cubes. In such cases, simply make a note on your character sheet or use some other counters that you may have on hand.
Cards[]
We will not use the entire card deck included with the Green Box of Games. Remove all of the Brick and Straw cards, returning them to the box. We will then build three decks of 12 cards each as outlined below:
- To build the Treasure deck, collect all of the cards with a green background.
- To build the Monster deck, collect all of the cards with a pink background.
- To build the Boss deck, collect all of the cards with a brown background.
Each of these decks is shuffled independently and placed face down near the play area. You may find it helpful to place the "extra" Cog tile next to the Treasure deck, the Hammer tile nest to the Monster Deck, and the Straw tile near the Boss deck, to help differentiate each deck. Note that as cards are used, they are not shuffled back into their respective decks unless the deck is empty or if the rules specifically state that the card should be shuffled back into its deck.
Other Items[]
You will need both dice (one black, one white). Use one for "your" rolls as the player and the other for the "monster's" rolls.
If you have the black meeple from the expansion, you can use it to represent your character's placement in the dungeon. If not, you can use a miniature, pawn, or any other type of token to do so. You can use the other meeples to represent the monsters.
You will also want to print out the character sheet to help you organize the cubes and track your character’s progress.
Set up[]
To set up the dungeon, draw tiles from the dungeon stack and arrange them face down in a 4 x 4 grid. When dealing out the tiles, they should not be all pointing the same direction, since the triangles on each edge (light/dark) determine what the "walls" of each dungeon are and where the doors are. It is likewise important when flipping tiles over horizontally that you do not change their orientation when flipping. See the "movement in the dungeon" section for more details and examples.
To determine where you enter the dungeon, choose a corner tile and flip it face up. Place your meeple on that tile. Finally, shuffle the two Straw tiles in with the remaining seven tiles from the dungeon stack. Use these to expand the grid to 5 x 5, on the opposite sides from your starting tile.
An example of a game layout (in progress):

Place your character token on the starting corner tile.
Place your starting resources/cubes on the character sheet as follows:
- 10 Red cubes, for your starting (maximum) health score. You will lose cubes when you take damage in the dungeon. If you ever run out of health, the game is over. You can gain health and/or heal to restore lost health while in the dungeon, which we'll explain later.
- 5 Blue cubes, for your starting (maximum) magic score. You will spend blue cubes anytime you use magic. There is no penalty for running out of magic (other than the inability to use spells). You can regain blue cubes in a few ways, which we will discuss later.
- 3 White cubes, representing your character's luck. You can use these to prevent your character's death. See the Luck Points section for more details.
- 3 Yellow cubes, which represent the value of the equipment you are taking with you in the dungeon. Treasure is chiefly used as a component of your final score, but can also be used to bribe monsters that you do not wish to fight.
- 1 Green cube on the first "Level" box, as you begin the game at first level.
Set all the remaining cubes aside for later use.
How to play[]
Each turn, the player will:
- Choose a new room to enter, which must be adjacent to your current position. If the way is blocked by a door, make a door roll (as described below). If the room is unexplored (the tile is still face down), flip the tile horizontally (maintaining its orientation).
- Move your meeple to the new room and resolve any actions based on its tile type. See Tile Types for descriptions.
- Add a black cube to the time tracker. See the Time Track section for more details.
- At the end of the turn, you can rest if you choose to and are in a safe place. See Resting for more information.
- Repeat steps 1 through 4 as necessary until you have defeated both bosses or have perished in the dungeon!
Movement in the Dungeon[]
Each tile has only two passable exits, one on each opposite side of the tile. The exits are on the sides that have light colored triangles. See the examples below.

In some cases, the arrangement of the two tiles will allow for two way movement between the tiles, because the light triangles match up to form a light square as shown here. In these instances, the player may freely go between rooms at the beginning of their turn as the path is an open passage.
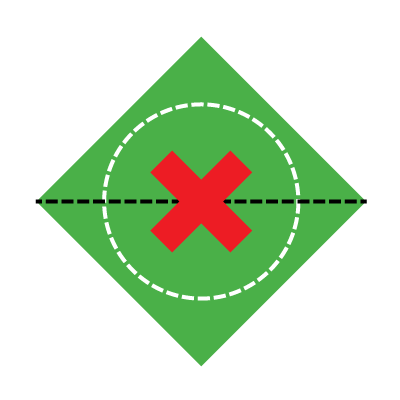
In other cases, movement between two rooms is impassable, as two dark triangles meet to form a dark square, as shown here. These represent solid walls. The same is true at the corners of all tiles, preventing diagonal movement. Note that the entire perimeter of the 5 x 5 dungeon is also considered to be walled: you cannot exit the dungeon once you have entered.
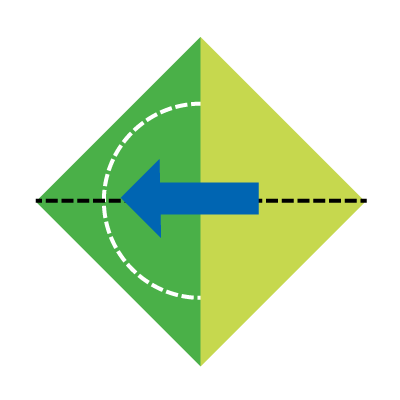
Sometimes, the sides of two tiles will show one side with a light triangle and the other dark, these represent closed doors as shown here. If you are exiting through a door from the "light" side, the door is open and you can freely pass through, but the door will magically shut behind you, hindering your return movement.
To move between rooms through closed doors, you must make a roll on one die (adding your level). You must roll higher than a 4 if you are returning to a room you have already visited. You must roll higher than a 6 to enter a room you have not yet explored. If you fail such a roll, you can try again, but only by adding another cube to the time track, to represent the additional time taken to unblock the door.
Below is an example of a section of the dungeon during play. Green tiles have already been explored, yellow tiles have not. The movement options are illustrated for ease of reference.

Luck Points[]
Luck cubes can be very useful to an adventurer, sometimes making the difference between life and death. If a player has taken damage that will reduce them to a single point of health (or lower), they can lose a luck cube to instantly heal. Roll both dice and heal a number of red cubes equal to the higher roll. You can use multiple luck cubes at a time if you choose.
You regain a luck point after you defeat a mini-boss, but only to the maximum of three. Likewise, you gain one luck cube each time you level up, but again only to the maximum of three at one time.
The Home Turf Rule[]
While in the dungeon, the monsters are defending their homes, which they know well. As such, if at any time the player and the monster tie, victory goes to the monster.
Resting[]
If the player is in a room that is not adjacent to any active monsters (i.e. ones that you have fled or bribed), they can choose to rest. Resting has multiple benefits, but also takes time, which makes it risky. If the player chooses to rest, immediately advance the time track by 3 black cubes. If this brings the time track to (or beyond) a multiple of five, perform an event check as outlined in the Time Track section of the rules. If those checks result in a disruption of the player's current location or triggers a wandering monster, the player does not gain any benefit from resting, though they can rest again (advancing the time track and so forth).
If the player is not interrupted, resting has the following benefits (in order):
- The player can restore red cubes to their health (not to exceed their maximum health). Roll both dice and heal a number of red cubes equal to the higher roll.
- The player can also restore blue cubes to their magic score (again, not to exceed their maximum magic score). Roll one die and restore that many blue cubes.
- The player can level up (if they have sufficient experience).
Levelling Up[]
When your character has accumulated 5 experience points (green cubes), you have the option to level up on your next rest. When you level up, you gain:
- +1 on combat rolls, rolls to open doors, and rolls to defend against traps.
- Your maximum health and magic scores increase by one each.
- You heal for 3 red cubes (up to your maximum health score) and regain magical power by 3 blue cubes (again, up to your maximum magic score).
Add one green cube to your level tracker and remove 5 cubes from the experience track when you level up.
Tile Types[]
Drop: Combat[]

Drop tiles represent the lair of some minor monster or beast. It could be an Orc, a Goblin, a Skeleton, or one of the bosses' henchmen like a warrior or minor wizard. Use your imagination!
When you enter this room, flip the top card from the Monster deck to represent the creature you are about to face. The number on the card indicates the monster's health. This is how many points of damage you must inflict to defeat the creature. The number also represents the amount of damage you will take if the creature hits you. Place red cubes on the monster card to keep track of its health and damage output.
- If the symbol on the flipped card is also a drop, then you have met a particularly nasty monster: add 1 to the difficulty. As such, it will inflict an additional point of damage on a hit (and you will have to deal one additional point to the monster to defeat it).
- If the symbol on the flipped card is a wood, then the creature you will fight has magical powers. Place blue cubes on the monster card to keep track of its magic capacity.
- If the symbol is a cog, then this creature is guarding a minor treasure! If you defeat the monster, you can draw one card from the Treasure deck.
As soon as you flip the tile, combat begins. See the Combat section for rules on how to conduct combats.
If the monster is defeated, you get 1 green cube (experience point) for your trouble. Shuffle the monster card back into the Monster deck.
If you fled the combat, sit the monster card aside and put a meeple on the tile you fled to represent the monster. The monster will be waiting for you if you return to that room! The monster retains any red and/or blue cubes that are on it.
Once you have cleared a drop tile by defeating the monster, you can freely move to and from that room in the future (unless the tile is "re-set" as described in the Time Track section).
Hammers: Harder Combat[]

Hammer tiles also bring combat, but this time with a more significant monster or beast. It could be a larger creature or one of the bosses' senior henchmen like an assassin or court sorcerer. It's up to you to decide!
When you enter this room, flip the top two cards from the Monster deck to represent the creature you are about to face. Use the higher of the two numbers to determine its health. Place red cubes on the monster card to keep track of its health and damage output.
- If the symbol on the either flipped card is a hammer or a drop, then you have met a particularly nasty monster: add 1 to the difficulty for each drop or hammer symbol.
- If the symbol on either flipped card is a wood, then the creature you will fight has magical powers. Place blue cubes on the monster card equal to the number on the wood card to keep track of its magic capacity.
- If either of the symbols is a cog, then this creature is guarding a minor treasure! If you defeat it, you can draw one card from the Treasure deck.
As soon as you flip the tile, combat begins.
If the monster is defeated, you get 2 experience points. Shuffle the monster card back into the Monster deck.
If you fled the combat, sit the monster cards aside and put a meeple on the tile you fled to represent the monster. The monster will be waiting for you if you return to that room! The monster retains any red and/or blue cubes that are on it.
Once you have cleared a drop tile by defeating the monster, you can freely move to and from that room in the future (unless the tile is "re-set" as described in the Time Track section).
Wood: Magic[]
Wood tiles represent a magical encounter within the dungeon. It could be beneficial or harmful to your character. Use your imagination to visualize the presence of a magical fountain, a cursed statue, or any other thing that you can think of to represent the source of the magic.
When you activate the magical effect, draw a card from the Boss deck to determine the magic's effects:
- If the symbol on the card is a Drop, you regain a number of red cubes (health) equal to the number on the card. Note that you cannot use these cubes to exceed your maximum health score.
- If the symbol is Wood, you receive a clairvoyant vision of some portions of the dungeon. You may choose a number of unflipped/unexplored rooms equal to the number on the card and flip those tiles. These tiles are not "cleared" for movement purposes. Mark these tiles with an unused cube to show that you have not yet actually explored them.
- If the symbol is Hammers, you have triggered a magical trap! Roll one die and add your level. You will take damage equal to the number on the card minus the roll.
- If the symbol is a Cog, then a magical trap guards some treasure! You will take damage the same as though the symbol was a Hammer (rolling to reduce the damage as described above.) However, if you survive you may draw two cards from the Treasure deck and choose one to keep.
Do not shuffle the Boss card back into the deck. You can move to and from this room in the future. Note that you cannot activate the magic in the room a second time unless the tile is "re-set" as described in the Time Track section.
Brick: Trap[]

Brick tiles represent rooms that have been trapped by the Bosses, to hinder the progress of adventurers like you. These can be deep pits that you could fall down, poisonous darts that shoot from the walls, or any other sort of damaging mechanism that you choose to imagine.
When you flip this tile, immediately draw a card from the Boss deck. You must roll one die and get a score equal to or higher than the number on the card drawn. Add your level to this roll. If you succeed on the roll, then you have avoided or disarmed the trap and take no damage.
If you did not succeed, you take damage equal to the number on the card minus your level.
- If the symbol on the card was Wood, then the trap was magical in nature. In this case you do not take damage by losing red cubes, but rather by losing blue cubes as your energies are drained away.
- If the symbol on the card was a Cog, then the trap was guarding a treasure and you may draw a card from the Treasure deck, whether you took damage or not.
Once you have resolved the trap's effect, do not shuffle the Boss card back into the deck.
You can now freely move to and from this room in the future (unless the tile is "re-set" as described in the Time Track section).
Cog: Treasure[]

Cog tiles represent treasure chambers, whether a vault, a store room, or simply a space where some treasure can be found.
On entering a treasure room, draw two cards from the Treasure deck. You may choose one to keep and shuffle the other back into the deck.
You can freely move to and from the room in the future. Note that these tiles only produce treasures the first time you enter, unless the tile is "re-set" as described in the Time Track section.
You are able to rest in treasure rooms if you choose to do so.
Straw: Boss[]

Straw tiles represent your objectives in the dungeon. In most cases, these will be the lair of the Evil wizard, the King of the Goblins, or other "Boss" monsters, but they can also represent any other goal that your character had to bring them to the dungeon.
When you flip the first Straw tile, that chamber contains the dungeon's mini boss. Flip the top card from the Boss deck to represent the creature you are about to face. The number on the card indicates the boss' health. Place red cubes on the boss card to keep track of its health and damage output.
- If the symbol on the flipped card is a drop or hammer, then you have met a particularly violent boss: add 1 to the difficulty.
- If the symbol on the flipped card is a wood, then the creature you will fight has magical powers. Place blue cubes on the boss card equal to the number on the wood card to keep track of its magic capacity.
As soon as you flip the tile, combat begins. See the Combat section for rules on how to conduct combats. The mini boss can not be bribed!
If the mini boss is defeated, you get enough experience points to advance to the next level. The Boss card is NOT shuffled back into the Boss deck.
The mini boss always possesses treasure: draw two cards from the Treasure deck.
Fighting a mini boss is taxing. Once the battle is concluded, you must take a rest (as described in the Resting section).
If you fled the combat, sit the boss card aside and put a meeple on the tile you fled to represent the boss. The Boss will be waiting for you if you return to that room!
Once you have cleared a Straw tile by defeating the monster, you can freely move to and from that room in the future. Boss rooms do NOT ever "re-set".
The Final Boss[]
When you flip the second Straw tile, you are about to enter the final stage of the dungeon! You must make a choice: Enter the room and face the boss or retreat (to return later). If you choose to retreat, return to the room you were in previously and start the next turn. (You do not add to the time tracker for this "retreat".)
When you enter this room, flip the top two cards from the Boss deck to represent the creature you are about to face. Use the higher of the two numbers to indicate its health. Place red cubes on the boss card to keep track of its health and melee damage output.
- If the symbol on the either flipped card is a hammer or a drop, then you have met a particularly violent boss: add 1 to the difficulty per hammer or drop symbol!
- The final boss always has magical powers. Place blue cubes on the monster card equal to the lower number of the two boss cards card to keep track of its magic capacity.
As soon as you draw the boss cards, combat begins. In addition, magical barriers appear once combat is joined that prevent you from fleeing! The final boss can not be bribed!
If you defeat the Boss, your adventure has come to a successful end! You gain 5 experience points and can draw three cards from the Treasure deck before tallying your final score. Congratulations!
Combat[]
Avoiding Combat - Bribes[]
If you want to avoid combat altogether, most monsters can be bribed. To bribe a monster, you must offer it a number of treasure cubes equal to the number on the card. For monsters in Hammer rooms, use the larger number of the two cards drawn. You can bribe a monster that you fled from earlier in the game, but only by spending twice as much treasure.
If a monster has been bribed, you can move from that room to the next. Place a meeple on the tile to represent the monster that still lives there. Place the treasure cubes and the monster's card(s) off to the side. If you re-enter this tile later, you will need to face the monster (or bribe it again). If you defeat this monster in later turns, you can reclaim the treasure you sacrificed (in addition to any other treasure the monster had on its own).
You cannot bribe traps, magical hazards, or either of the bosses. You can only bribe on the first round of combat with a monster. If you want to escape after you have engaged the enemy, you must flee instead.
Combat Sequence[]
Combat flows through three phases: Flight, Magic, and Melee (in that order). If both combatants are still alive after those phases have taken place, they repeat until the combat is over.
Flight Phase[]
At the beginning of each combat turn, if both parties still have health, the player may choose to flee unless they are in combat with the final boss. As the monsters are defending their home, they will never flee. If the player decides to flee, each side rolls a die. The player adds their level to the roll.
- If the player wins the roll, move their meeple to the any adjacent room that they have already explored. The monster card (and any bribes or other treasure) are set aside and a monster meeple is placed on the room that the player fled. The monster will be waiting for you if you return to that room!
- If the player did not win the roll, combat continues as usual except: The player may not use magic this round and any combat rolls they make this turn do not receive any bonuses to the roll. The monsters will fight as normal.
Magic Phase[]
If you have one or more blue cubes, you have an option to use magic instead of making a melee attack.
- You can use one cube to cast a spell that inflicts one point of damage to the monster, plus one additional point per level that they have attained. No die roll is needed.
- You can use three cubes to cast a more powerful spell. It inflicts damage equal to the roll of one die, plus one additional point per level. Casting such powerful spells can take its toll, however. The player takes one point of damage (loses a red cube) each time they cast such a spell.
Some magical treasures also allow the player to perform a magic attack. The player can also drink a single potion during the Magic phase, but only if they did not cast a spell this turn. See the Treasure section for additional details.
Some monsters and bosses can also use magic. Any time you reveal a monster or boss card with a Wood symbol, that monster (or boss) is a spellcaster. They begin with a number of blue cubes equal to their difficulty. They can use the cubes in the same manner as the player, except:
- When a monster uses a blue cube, it inflicts damage equal to the monster's difficulty.
- Only bosses can use 3 cubes at once for powerful magic. When they do, they inflict damage equal to the roll of one die plus their difficulty, after which they will take a point of damage.
- If a monster or boss has any blue cubes to use for magic, they will always choose to use magic instead of joining melee combat.
- A boss will always use three cubes for powerful magic (if possible) before using a single cube for a lesser spell.
- Magical monsters will only participate in a melee combat after they have expended all of their blue cubes.
Melee Phase[]
For melee combat, the player will roll one die and the monster will roll another of a different color.
- The player will add their level to the roll, as well as any bonus received from magical treasures.
- The monster will add one to the roll if the fight is in a Hammer room. They will add two to the roll if it is a mini boss or three if it is the final boss.
Note: If both combatants cast spells this turn, skip the Melee phase. If only one combatant cast a spell, they do not add any of the above bonuses to their melee roll, since they were merely defending themselves from the melee attacks of the non-spell caster.
Whichever side's total is higher wins the round.
- If the player wins (and did not cast a spell this turn), they inflict damage to the monster equal to one point plus any bonuses from magical treasures.
- If the monster wins (and did not cast a spell this turn), the player takes damage equal to the monster's difficulty number.
- If a combatant who cast a spell this turn also wins the melee roll, no melee damage is inflicted this round.
Ending Combat[]
Combat ends only one of two ways: death or flight. If one or the other of the combatants runs out of health during any phase, the battle is over. If the player is out of life, the game ends; proceed to tally the score. If the monster or boss is defeated, the player receives experience and/or treasure as determined by the type of room that they are in.
The Time Track and Events[]
There are two components of the time track: the main counter and the event counter. The main counter begins at zero at the beginning of the game. Add black cube(s) to the time track:
- Each time the player clears a room, a black cube is added to the time track.
- Choosing to rest adds three cubes to the track, as does the mandatory rest that occurs after defeating the first boss.
- Moving through rooms that you have already cleared via open passages does not take any time. Passing through doors from the closed side will require a roll to open the door and will add one to the time track per door passed through.
The dungeon is a dynamic environment; it is the home of the monsters and the bosses! As such, every time the time track hits a multiple of five, place a cube in the event row of the time tracker and check for upkeep and wandering monsters as outlined below. When the time track hits 15, clear all cubes from the main track and remove 2 cubes from the event track.
Dungeon upkeep:[]
The dungeon is a dynamic environment, as it is the home of the monsters and the bosses. From time to time, they will maintain their lair by resetting the traps, relocating treasures, and posting fresh sentries. This is dungeon upkeep and is checked once per cube in the event counter track.
Roll two dice. If a six is rolled on either, no upkeep takes place. Otherwise, starting with the top left tile, count a number tiles over to the right equal to the roll of the first die. Starting with the tile determined by the first die, count tiles down equal to the roll of the second die. If that tile has been explored by the player, flip that tile back over and it is considered to be re-set and is no longer cleared. If the player returns to that tile, it will trigger as though it were an unexplored room. Traps will trigger, monsters will appear in Drop or Hammer rooms, etc.
No upkeep takes place (do not flip the indicated tile) under the following circumstances:
- If the room has not yet been explored
- If it room is the room the player is currently in
- If the room is a Boss room
Wandering monsters:[]
Roll a die. If the result is equal to or less than the number of cubes in the event counter track, a wandering monster appears in the room that the player's meeple is in! Treat the room as though it were a Drop tile for purposes of generating the monster and conducting combat. Wandering monsters encountered while resting cannot be bribed. Advance the time track by one when the combat is over. If the wandering monster attacked while the player was resting, the only benfit that they can get from that rest period is a restoration of red cubes equal to the roll of one die, since they were interrupted.
Treasures and the Treasure Deck[]
Each time the player claims a card from the treasure deck, they are awarded a number of yellow treasure cubes equal to the number on the card, regardless of the type of card. These represent coins, gems, or other items of value. In addition, some of the treasure cards bestow additional benefit:
- Treasure cards with a Drop symbol represent healing potions. These can be used immediately or held in reserve for use at the end of any turn, prior to advancing the time tracker. A healing potion will restore a number of red cubes to the player's health equal to the number on the card times two. Once used, the card is shuffled back into the Treasure deck.
- Treasure cards with the Wood symbol represent magical potions. Magic potions restore a number of blue cubes to the player equal to the number on the card. This can only restore cubes up to the player's maximum magic score. These potions may be used immediately or held in reserve for use in combat or at the end of any turn, prior to advancing the time tracker. When the potion is used, the treasure card is shuffled back into the Treasure deck.
- Treasure cards with Hammer symbols represent magical weapons or protection. These are retained for the duration of the game and each adds to the player's combat rolls equal to the number on the card. You may only have one such card in your possession at any time. If you draw another Hammer treasure card later in the game, you may trade one (the old OR new one) for a number of yellow treasure cubes equal to twice the number on the card you are trading. The traded card is not shuffled back into the treasure deck.
- Treasure cards with a Cog symbol represent coins, gems, or other items of value. They award double the number of yellow cubes indicated by the number on the card before being reshuffled into the treasure deck.
Scoring (Optional)[]
If you defeated both of the bosses that inhabit the dungeon, you have won! But whether you have defeated the final boss or died trying, your final score is a great way to challenge yourself in future games or to compare your results with other players!
- Count all of the red, blue, and yellow cubes that your character has remaining, they are worth one point each. Add two points each treasure card that you have in your possession (magic weapons and potions). Add 10 points per level attained and 1 point per experience point remaining. Add 20 points for each white luck cube you had at the end of the adventure. This determines your initial score.
- In a separate tally, count the number of dungeon tiles that are still face down as one point each. Add 5 points for every monster meeple that remains on the dungeon tiles because you fled combat (do not count monsters that were bribed). Add 5 points for each black cube on the event tracker. These are your penalties.
Subtract the penalty from your initial score to determine your final score.